You can not select more than 25 topics
Topics must start with a letter or number, can include dashes ('-') and can be up to 35 characters long.
2.6 KiB
2.6 KiB
1. 创建多个SSH-KEY
电脑上安装Git客户端,之后鼠标右键Git Base Here,输入SSH命令
# 生成ssh-key,~/:指的是C盘用户的地址,一般是C:\Users\Administrator\.ssh
# 这里生成公司对应的私钥和公钥,username@email.com 邮箱是你公司给你分配的邮箱
ssh-keygen -t rsa -C "10402852@qq.com" -f ~/.ssh/gitee_gs_id_rsa

# 生成ssh-key,这里生成自己的私钥和公钥,用于写一些Demo上传到Gitee上
ssh-keygen -t rsa -C "superhuanghai@foxmail.com" -f ~/.ssh/gitee_my_id_rsa
生成完之后,到自己的电脑上**.ssh**文件下找,可以找到四个文件
gitee_gs_id_rsa
gitee_gs_id_rsa_pub

gitee_my_id_rsa
gitee_my_id_rsa_pub
2. 创建config文件
因为小张配置了两个gitee的公钥和私钥,但是这个信息呢,只有小张知道,所以需要告知电脑,说那个gitee对应哪个地址。
在.ssh,同级目录下新建config文件,可以新建txt然后去掉后缀更改名字,右键打开新增配置
# gitee 自己的gitee
Host gitee_my
HostName gitee.com # 不允许更改
PreferredAuthentications publickey
IdentityFile ~/.ssh/gitee_my_id_rsa
User 18686619970


# gitee 公司的gitee
Host gitee_gs
HostName gitee.com
PreferredAuthentications publickey
IdentityFile ~/.ssh/gitee_gs_id_rsa
User 18946740350
这样,我们的config文件就配置好了
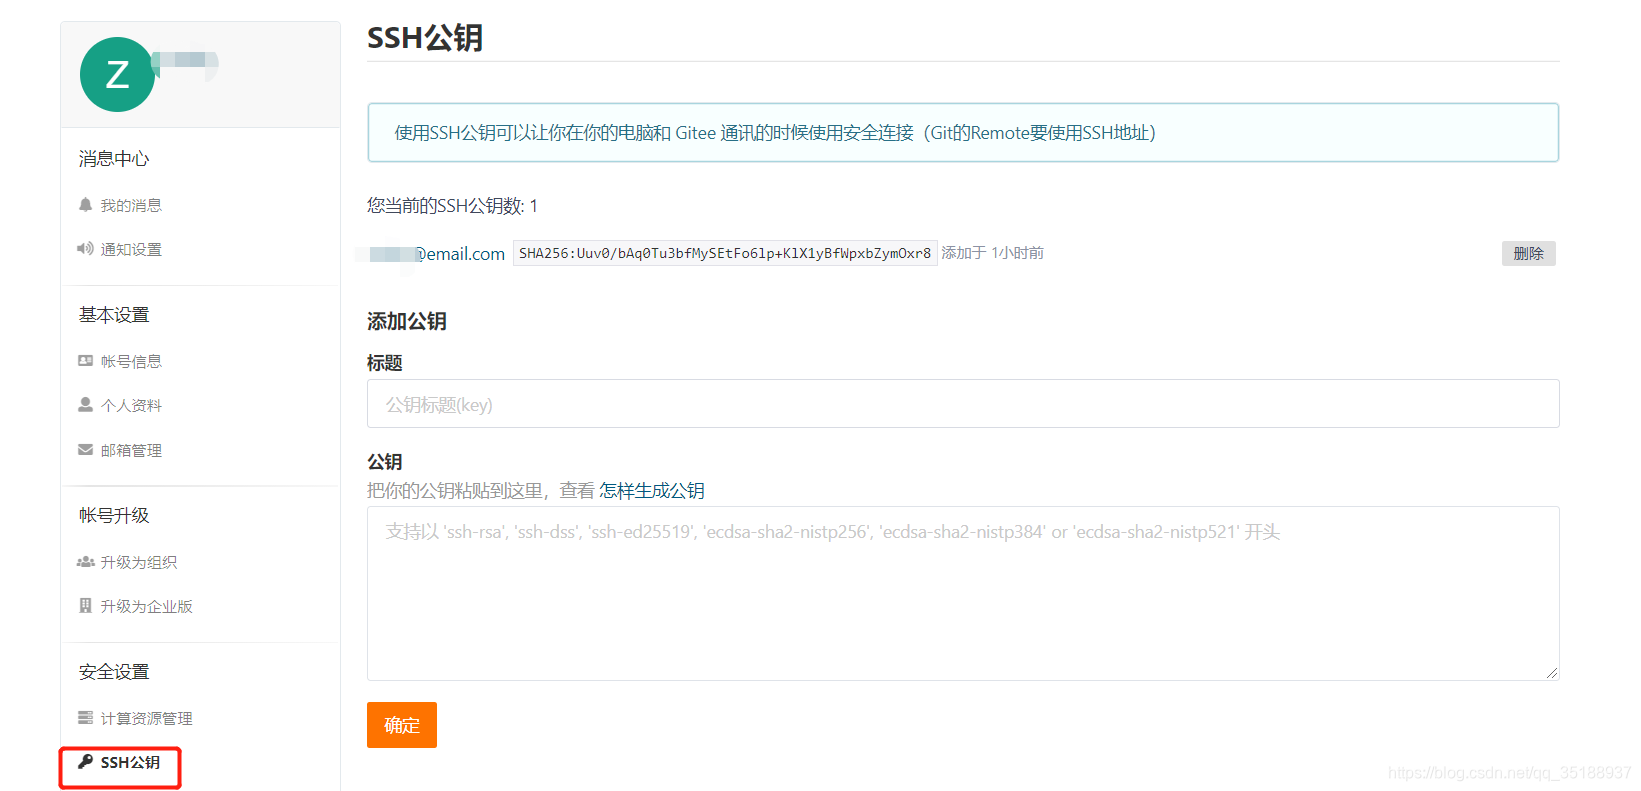
3. Gitee添加公钥
这时候,小张就要登录Gitee网址,登录公司的Gitee还有自己的Gitee。
点击头像,有个设置,然后看左边菜单有个SSH公钥,从gitee_gs_id_rsa_pub和gitee_my_id_rsa_pub上复制的一串字符串,根据登录账号设置进去
4. 验证是否成功
在.ssh目录下,右键Git Base Here,输入命令
# 注意 git@ 后面带的gitee_gs 是你config配置的别名。还有Gitee网址没有配置公钥,这里是访问不了的
ssh -T git@gitee_gs
 出现successfully则是访问成功
总结
小张总算是知道怎么配置了,无非就是新增私钥公钥,创建Config文件区分,Gitee添加公钥,然后再验证就可以。巴适的很。
小张觉得,嗯,今天又学到了一点。简简单单。