10 KiB
一、服务器端下载
https://github.com/xinnan-tech/xiaozhi-esp32-server
二、安装Anaconda3
下载地址
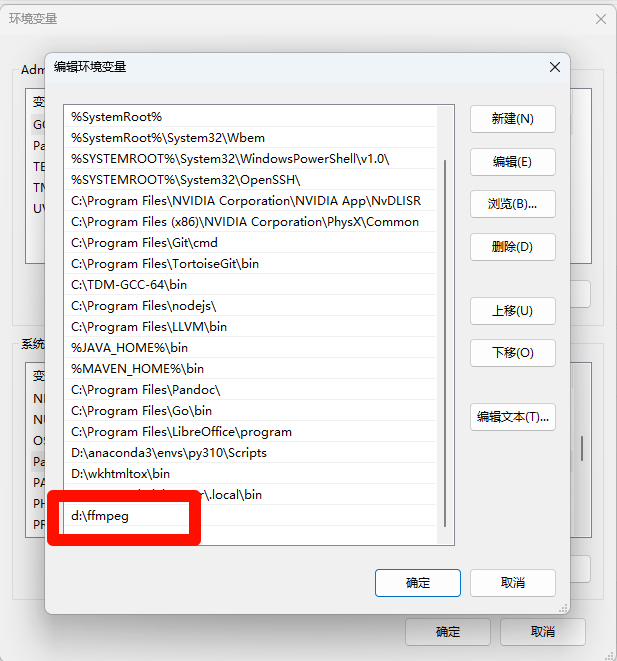
将下面的四个目录添加到环境变量中
D:\anaconda3\Library\mingw-w64\bin
D:\anaconda3\Library\bin
D:\anaconda3\Library\usr\bin
D:\anaconda3\Scripts
确认是否安装成功
WIN+R,输入cmd打开控制台,输入conda -V
使用Anaconda 的黑窗口进行配置
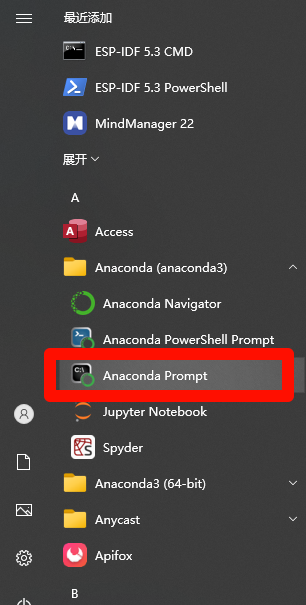
C:\ProgramData\Microsoft\Windows\Start Menu\Programs\Anaconda (anaconda3)\Anaconda Prompt.lnk
设置Anaconda镜像
conda config --remove-key channels
conda config --add channels https://mirrors.tuna.tsinghua.edu.cn/anaconda/pkgs/free/
conda config --add channels https://mirrors.tuna.tsinghua.edu.cn/anaconda/pkgs/main/
conda config --add channels https://mirrors.tuna.tsinghua.edu.cn/anaconda/cloud/conda-forge/
conda config --add channels https://mirrors.tuna.tsinghua.edu.cn/anaconda/cloud/msys2/
conda config --show channels
创建环境
conda create --name xiaozhi-esp32-server python=3.10
激活环境
conda activate xiaozhi-esp32-server
三、部署步骤
1、包安装
# 开始部署
d:
cd D:\dsWork\DuoDuoProject\xiaozhi-esp32-server-0.7.1\main\xiaozhi-server
pip install -r requirements.txt
2、音频库安装
# 音频的编码解码库
pip install opuslib
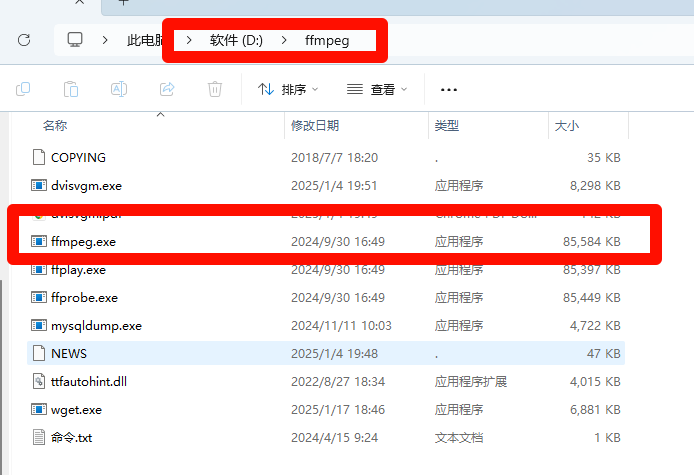
pip install ffmpeg
安装音频处理工具,录制,转码,剪辑等
https://github.com/ShiftMediaProject/opus/releases/download/v1.4/libopus_v1.4_msvc17.zip
依据下面的文档指示,对环境代码进行配置:
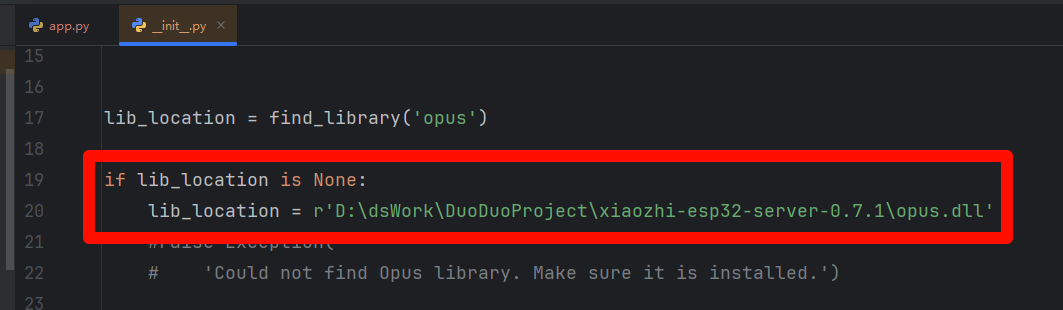
解决Exception: Could not find Opus library. Make sure it is installed.
# 找到报错文件 D:\dsWork\DuoDuoProject\xiaozhi-esp32-server-0.7.1\.venv\Lib\site-packages\opuslib_next\api\__init__.py

if lib_location is None:
    lib_location = r'D:\dsWork\DuoDuoProject\xiaozhi-esp32-server-0.7.1\opus.dll'
3、语音识别库安装
下载语音识别模型文件
https://pan.baidu.com/share/init?surl=QlgM58FHhYv1tFnUT_A8Sg&pwd=qvna
将model.pt 放到
D:\dsWork\DuoDuoProject\xiaozhi-esp32-server-0.7.1\main\xiaozhi-server\models\SenseVoiceSmall

4、配置文件
配置项目
- 创建data目录
- 把源码目录下的config.yaml文件复制一份,重命名为.config.yaml
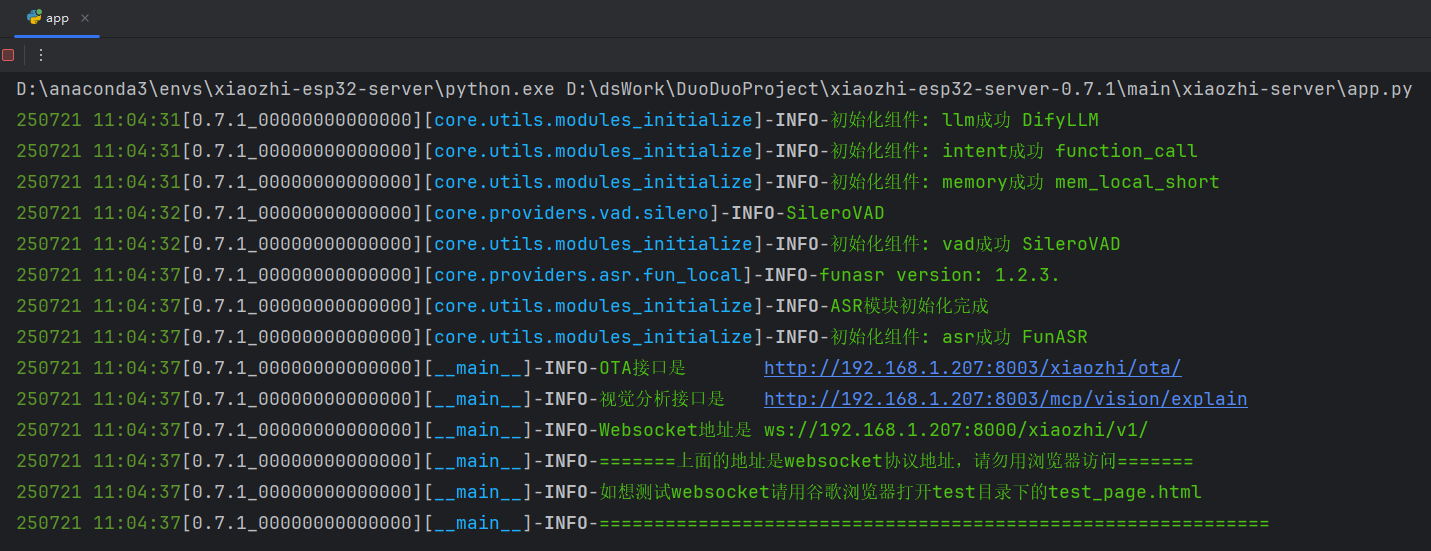
5、Python端服务启动
# 启动后端服务【端口:8002】
D:\dsWork\DuoDuoProject\xiaozhi-esp32-server-0.7.1\main\xiaozhi-server\app.py
6、JAVA OTA启动

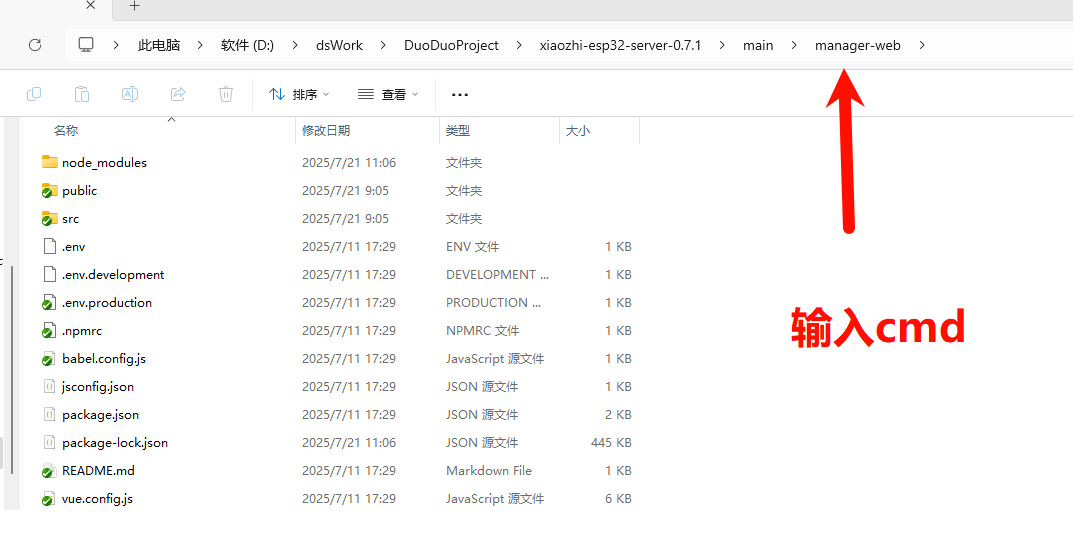
7、启动前端页面【不启动也可以~】
# 安装Node.js
#我的电脑:
D:\dsWork\DuoDuoProject\xiaozhi-esp32-server-0.7.1\main\manager-web
#在地址栏输入 cmd 回车,然后输入:
npm install
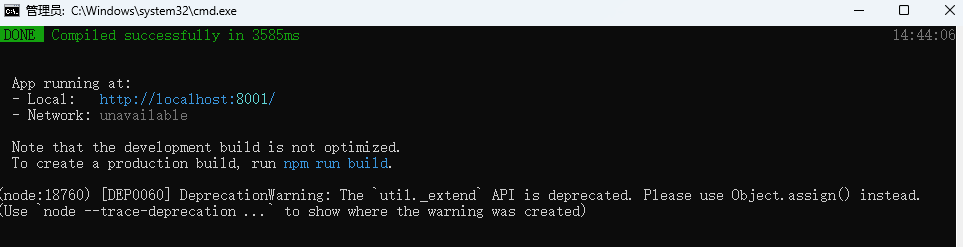
npm run serve
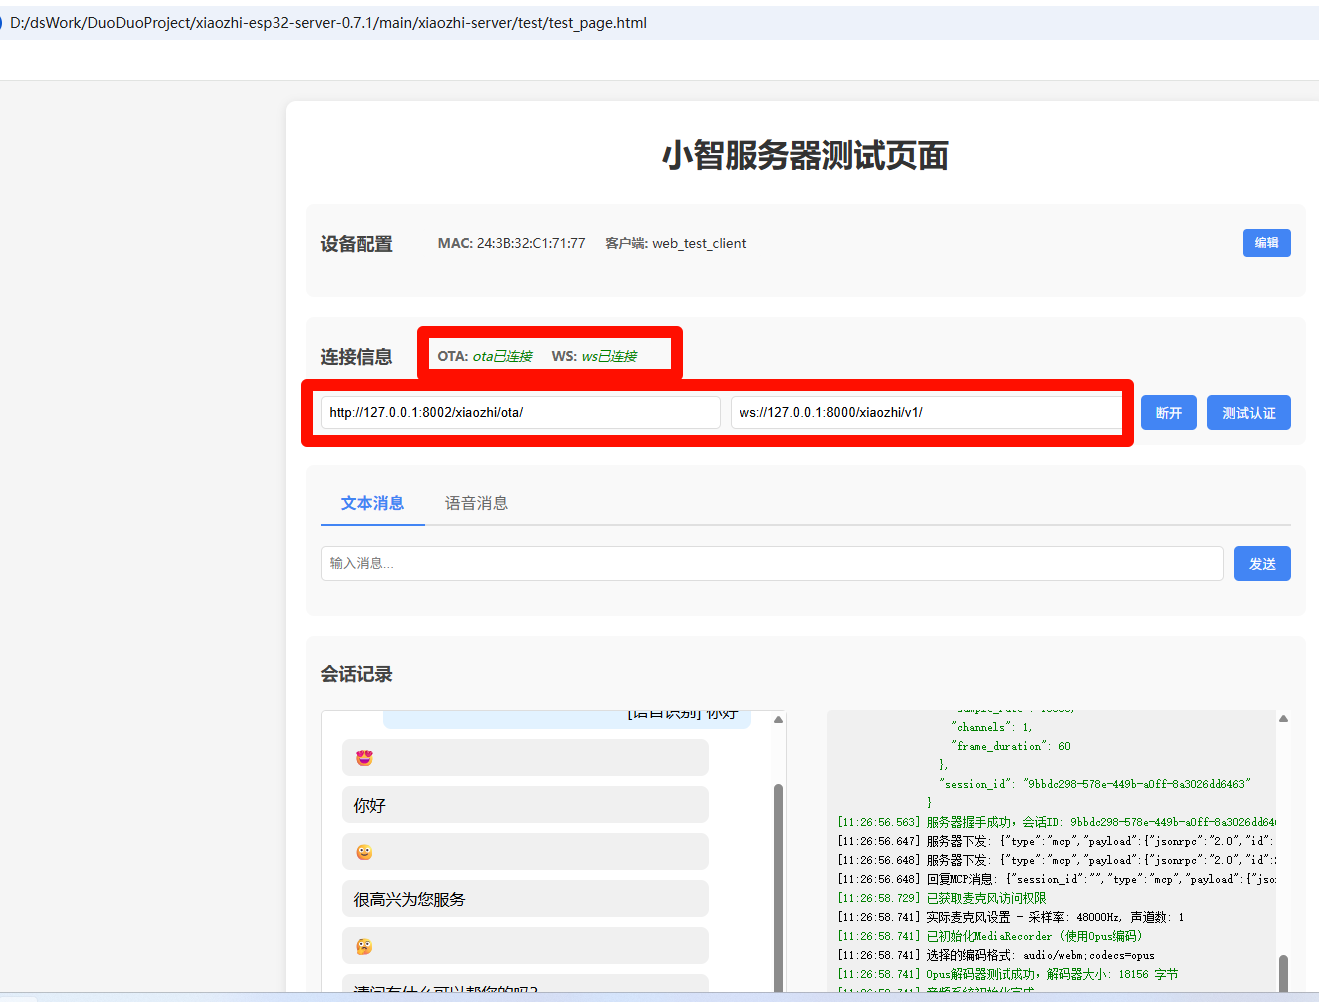
8、测试页面
file:///D:/dsWork/DuoDuoProject/xiaozhi-esp32-server-0.7.1/main/xiaozhi-server/test/test_page.html
http://127.0.0.1:8001/#/home
huanghai
DsideaL@123
四、Windows搭建 ESP IDF 5.3.2开发环境以及编译小智

五、修改固件
- 固件编译工具
esp-idf-tools-setup-offline-5.3.2.exe
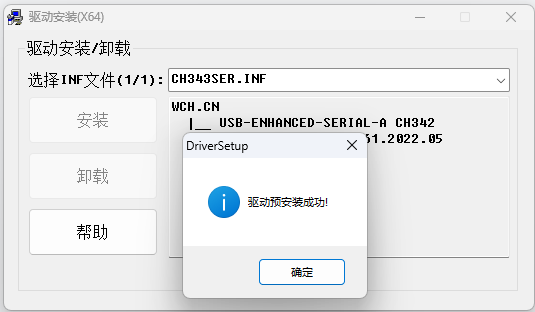
- 驱动程序
CH343SER.EXE
- 实验材料
处理器型号
ESP32-S3-N16R8
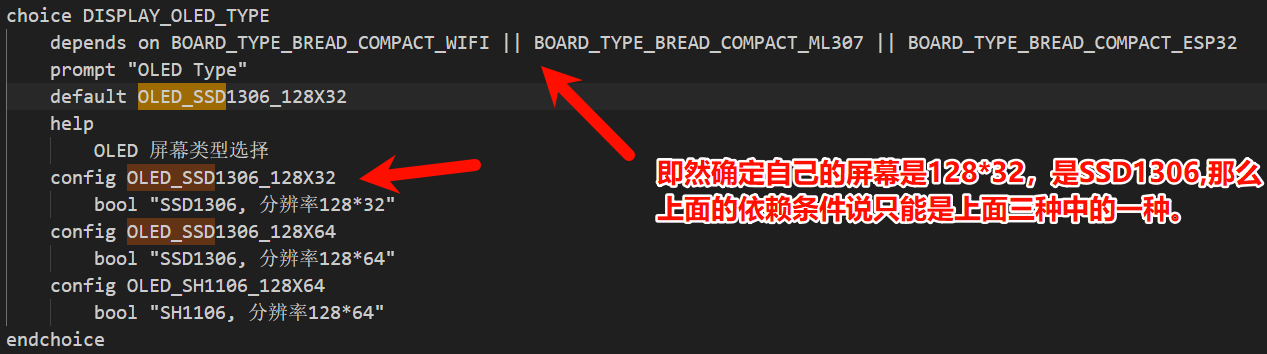
屏幕 0.91英寸,SSD 1306,分辨率:128*32

- 烧录步骤
步骤1 双击桌面上的ESP-IDF 5.3 PowerShell 快捷方式
步骤2
https://icnynnzcwou8.feishu.cn/wiki/JEYDwTTALi5s2zkGlFGcDiRknXf
# 进入工作目录
cd D:\dsWork\DuoDuoProject\xiaozhi-esp32

# 全面清空
del build

# 设定目标板
idf.py set-target esp32s3
步骤3
进入配置界面
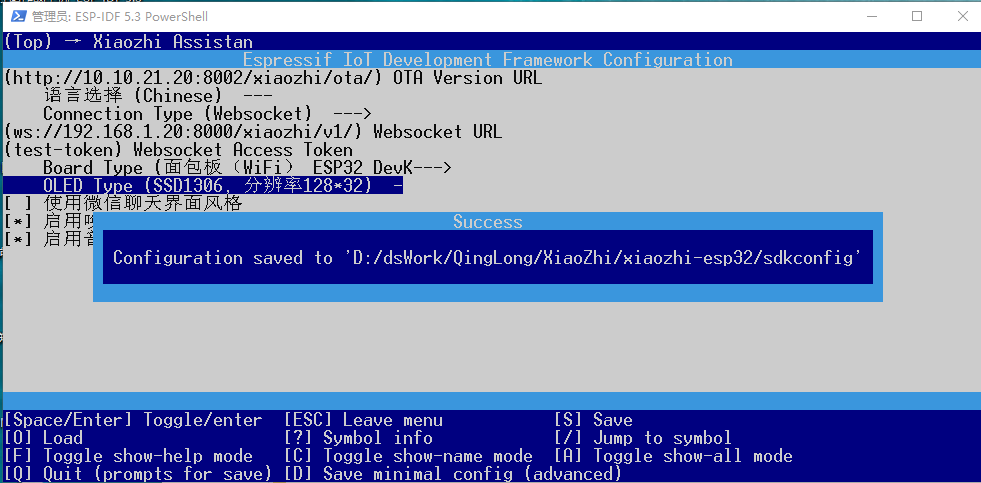
idf.py menuconfig
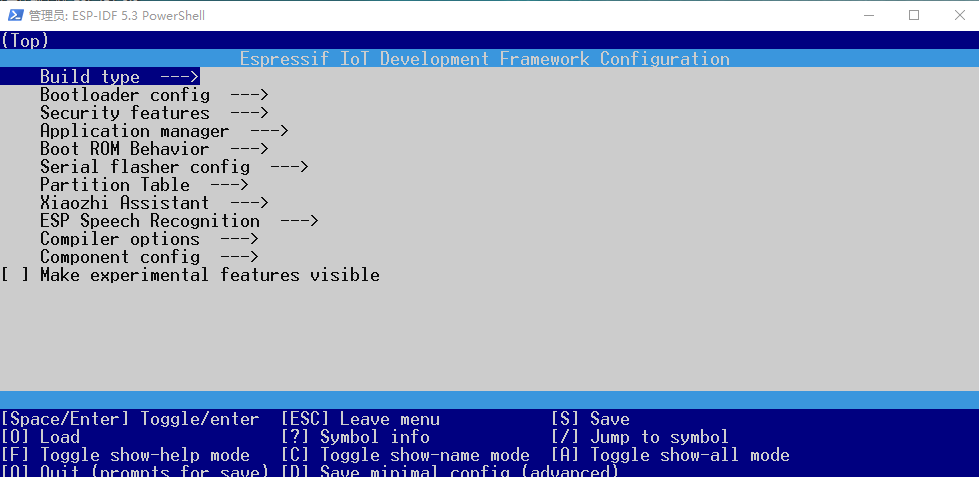 配置一下
配置一下
进入Xiaozhi Assistant选项
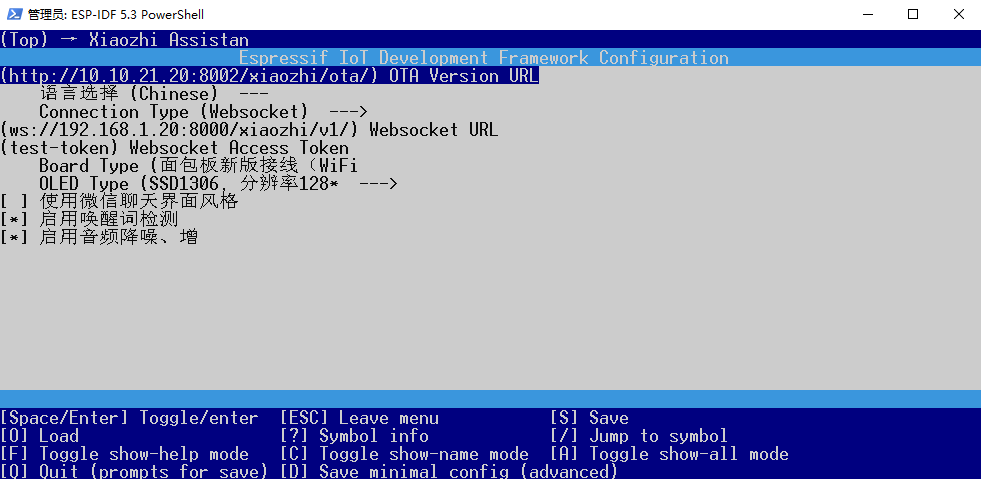
Board Type:
config BOARD_TYPE_BREAD_COMPACT_WIFI
    bool "面包板新版接线(WiFi)"

DISPLAY\_OLED\_TYPE:
OLED\_SSD1306\_128X32
按ESC退回主界面,再点S进行保存。
编译固件
idf.py build
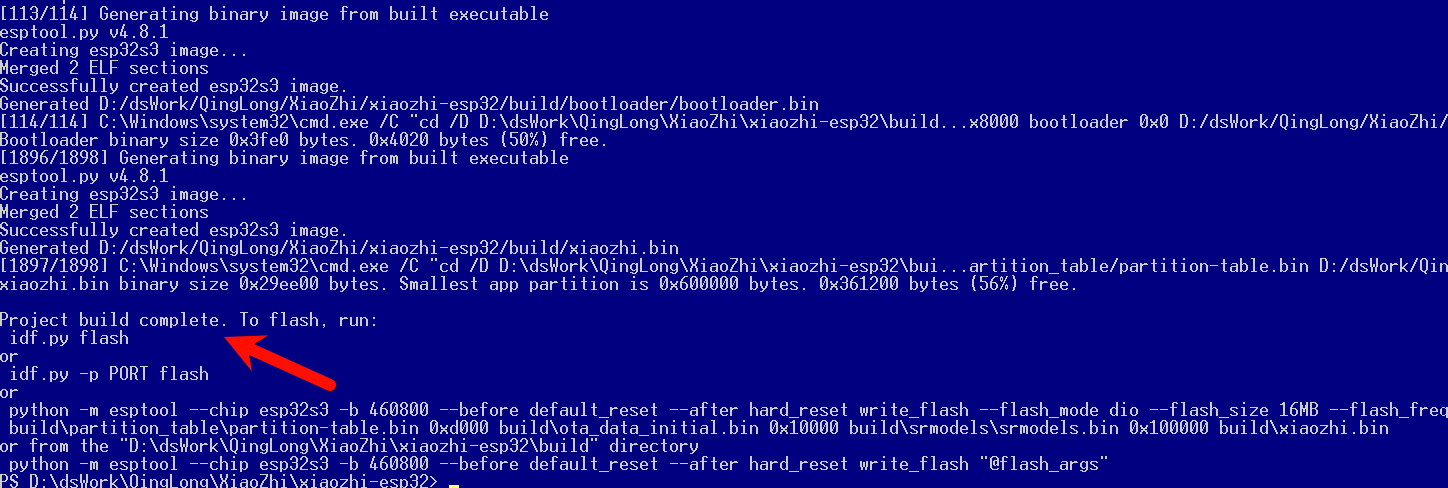
打包bin固件
cd scripts
python release.py
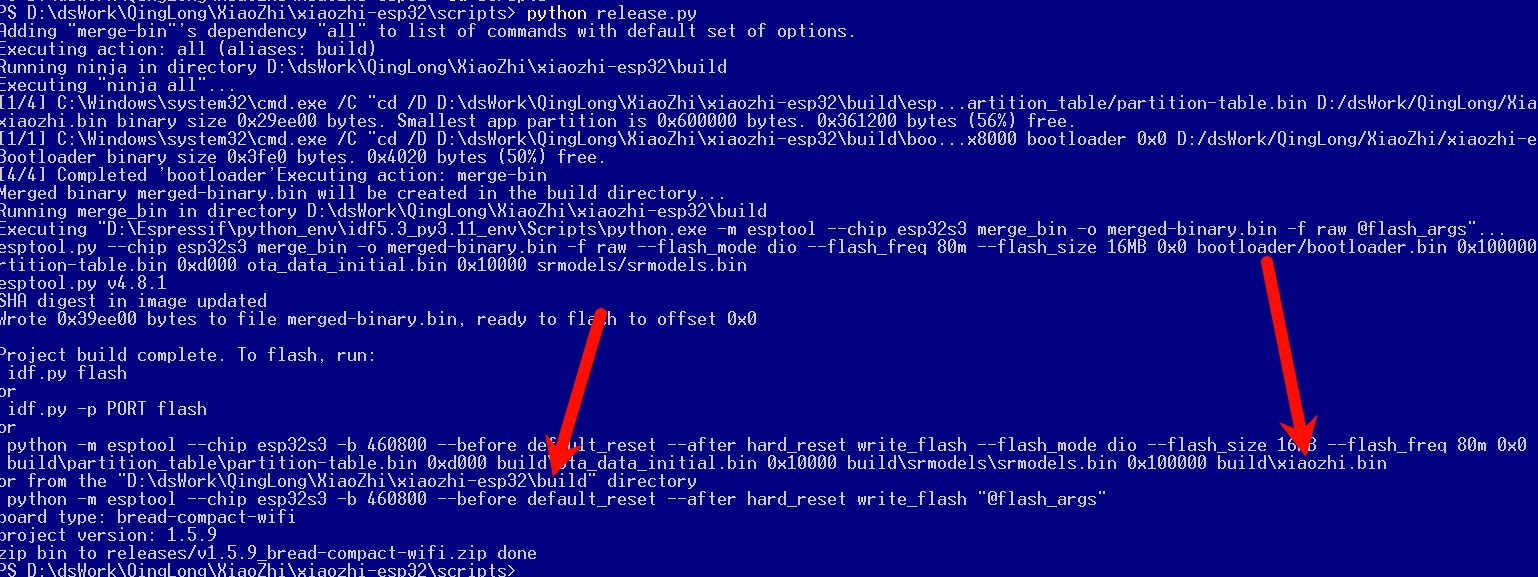
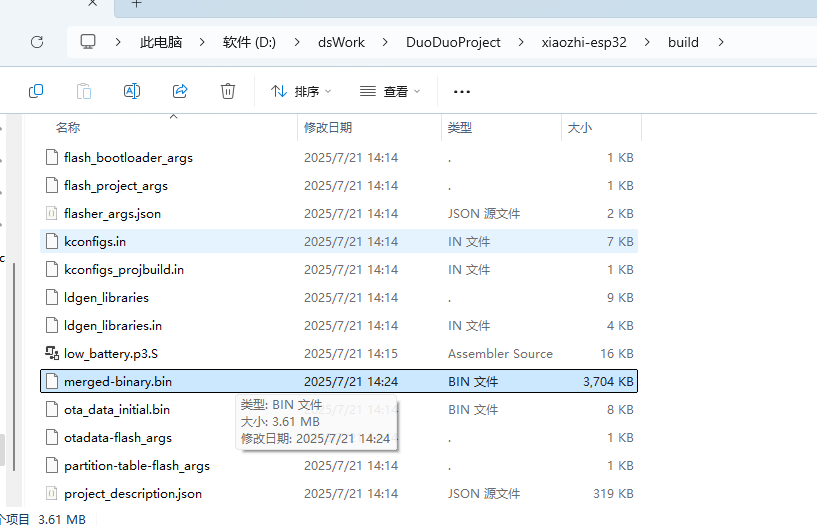
打包后的产物
D:\dsWork\DuoDuoProject\xiaozhi-esp32\build\merged-binary.bin
-
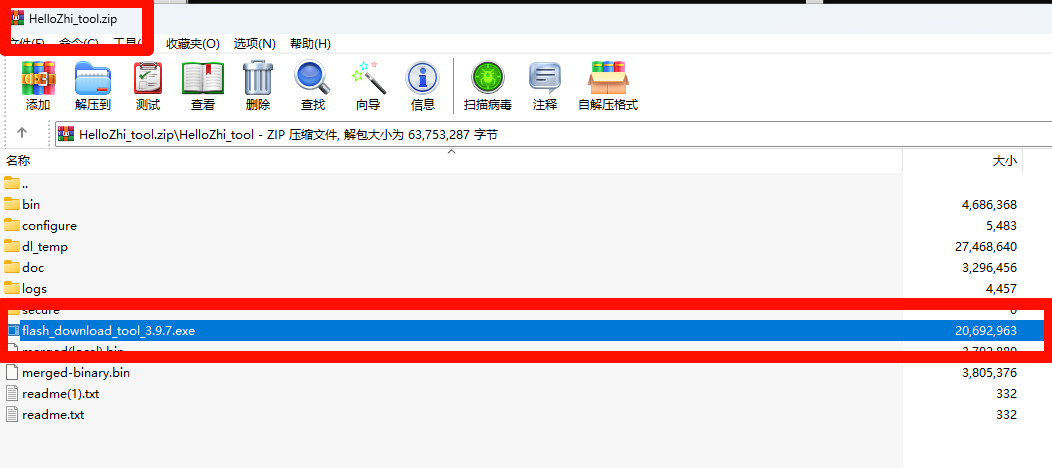
开始烧录

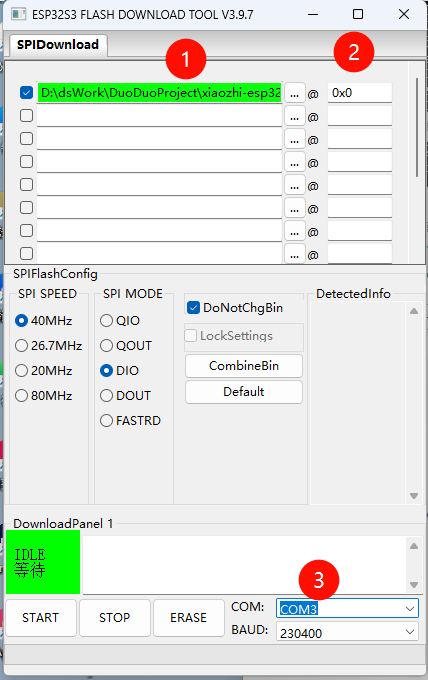
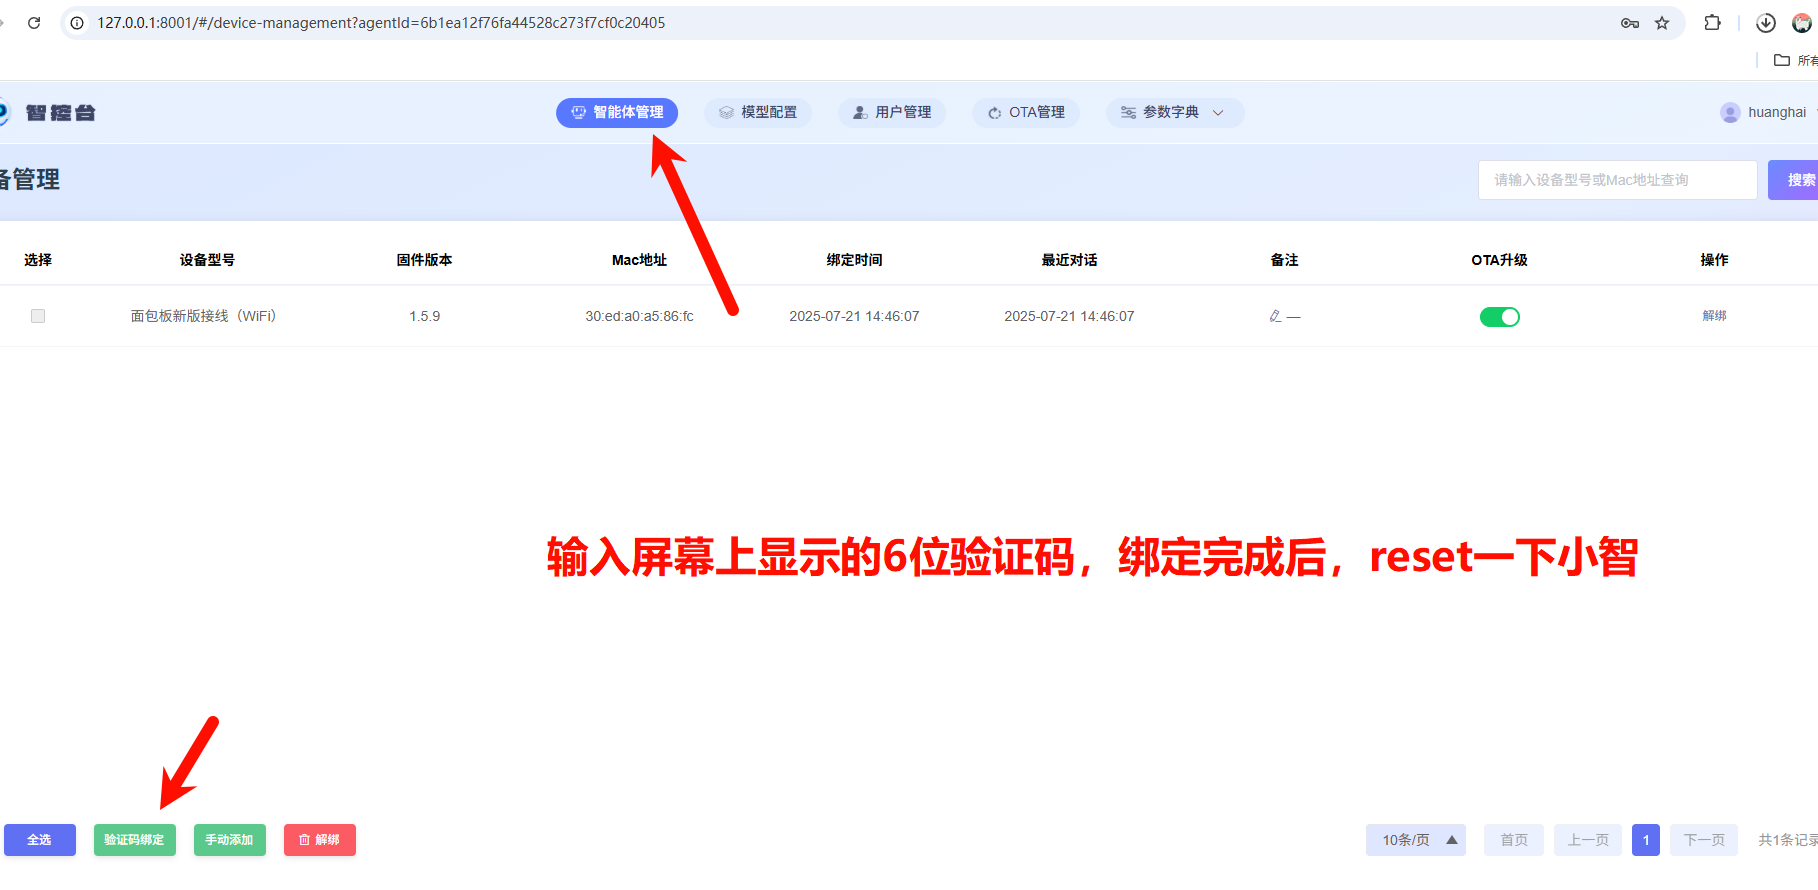
烧录完成后,按下主板上的RST按钮,也就是板子右侧上方第一个按钮。
然后进入配网模式: 查看显示屏上的热点名称,即SSID值,用手机或电脑连接到此热点,对ESP32主板进行配网,让其连入WIFI
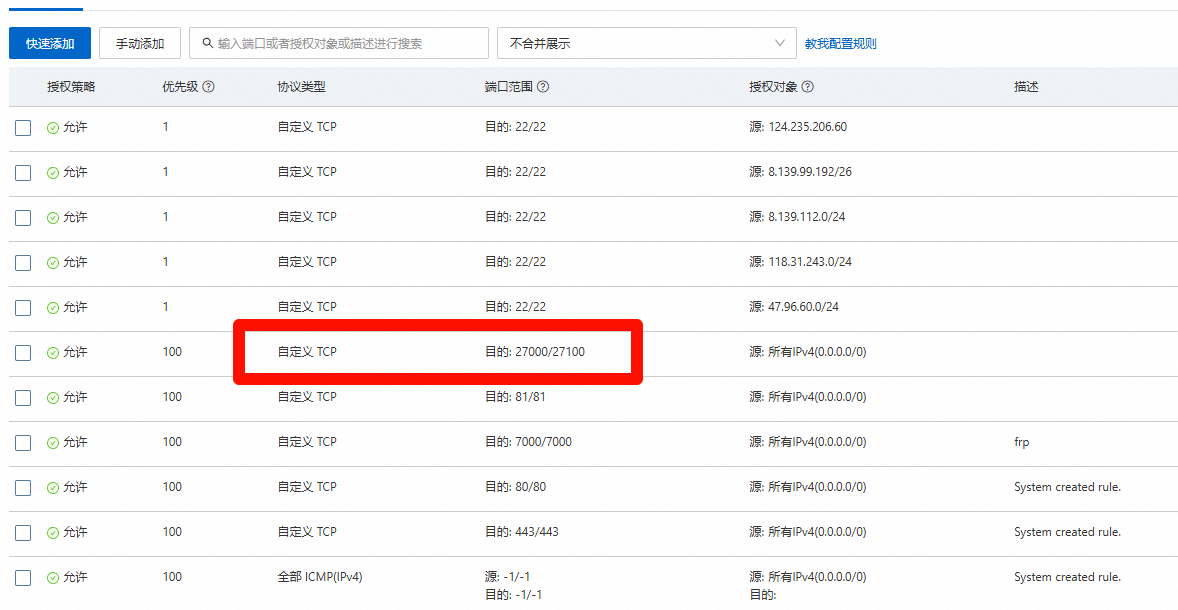
六、网络映射
网络映射
知识库 8000 --->8100
小智
8000 websocket --> ws://www.hzkjai.com:27014
8001 WEB UI --> http://www.hzkjai.com:27011 8002 OTA+JAVA --> http://www.hzkjai.com:27012 8003 http server --> http://www.hzkjai.com:27013
需要注意的是绘制科技的服务器,需要配置一下安全策略的范围:
测试页面 file:///D:/dsWork/QingLong/XiaoZhi/xiaozhi-esp32-server/main/xiaozhi-server/test/test_page.html
七、相关资料
D:\dsWork\DuoDuoProject\xiaozhi-esp32-server-0.7.1\main\xiaozhi-server\core\connection.py
681行:
 # 黄海扩展
            if '史记' in query:
                llm_responses = self.llm.response(
                    self.session_id,
                    self.dialogue.get_llm_dialogue_with_memory(
                        query, self.config.get("voiceprint", {})
                    ),
                )